Install Jupyter on Windows
Installing Jupyter Notebook or Anaconda on Windows
This guide provides simple and effective instructions for installing Jupyter Notebook on a Windows system using Python. Alternatively, for a better experience, you can install Anaconda or Miniconda, which come with Jupyter and additional tools pre-installed. It also includes solutions for common issues during the installation process.
Prerequisites
- Python Installed: Ensure Python is installed on your system if you plan to use Jupyter directly. If not, download it from the official Python website.
- Operating System: Windows 10 or later.
Steps
Option 1: Install Jupyter Notebook (If you only need Notebook)
- Open your Command Prompt.
-
Run the following command to install Jupyter Notebook:
python -m pip install jupyterThis command uses
pip(Python’s package installer) to download and install Jupyter Notebook.
Option 2: Install Anaconda or Miniconda (Recommended)
- Visit the Download Pages:
- Choose the Right Installer:
- Select the installer suitable for your system (e.g., Windows 64-bit).
- If you’re unsure which to choose, refer to the table below for guidance.
Comparison Between Anaconda and Miniconda:
Feature Anaconda Miniconda Includes conda Yes Yes Includes Anaconda Navigator Yes No Number of Packages Over 300 Less than 70 Install Space Required Approximately 4.4 GB Approximately 480 MB Recommendation:
- Choose Anaconda for a ready-to-use environment with many pre-installed packages.
- Choose Miniconda for a lightweight installation, adding only the packages you need.
- Run the Installer:
- After downloading the installer, double-click to run it.
- Follow the on-screen instructions.
Resolve Installation Issues (If Any)
If you encounter any problems during installation, click on the dropdown menu below for solutions:
Common Issues and Solutions
1. **Theme Errors or Conflicting Packages**: - If you see an error like: ``` AttributeError: module 'notebook.services.contents.filemanager' has no attribute 'themes' ``` Or face other theme-related or package conflicts, follow these steps: 1. Uninstall all Jupyter-related packages by running: ```bash pip uninstall jupyter jupyterlab notebook nbconvert nbformat ``` 2. Clear the pip cache to remove residual files: ```bash pip cache purge ``` 3. Reinstall Jupyter Notebook: ```bash python -m pip install jupyter ``` 2. **'jupyter' is not recognized as an internal or external command**: - This error occurs when the Python Scripts folder is not in your system's PATH. - Solution: - Add the Python Scripts folder (e.g., `C:\Users\YourUsername\AppData\Local\Programs\Python\PythonXX\Scripts`) to your system's PATH environment variable. - Restart your Command Prompt after making the changes. 3. **Outdated pip Version**: - An outdated pip version can cause installation problems. - Solution: - Upgrade pip by running: ```bash python -m pip install --upgrade pip ``` 4. **Missing Dependencies**: - Missing dependencies can lead to incomplete installations. - Solution: - Install required dependencies with: ```bash python -m pip install --upgrade setuptools wheel ```Additional Notes
- For Anaconda Users: If you’re new to Python or Jupyter, Anaconda is the easiest way to get started. It includes Jupyter Notebook, Python, and numerous pre-installed libraries and tools for data science.
- For Miniconda Users: If you want more control over which packages are installed, Miniconda is a great option.
- Always ensure you are running the latest version of Python and pip.
For more information:
By following these steps, you will have Jupyter Notebook, Anaconda, or Miniconda installed on your Windows system, ready for your data science and machine learning projects. Happy coding!
Python is a versatile programming language widely used in data analysis, web development, and more. This guide explains how to install the latest version of Python on Windows.
Step 1: Download Python
- Download the Python installer for Windows directly: Python 3.13.1
- If it does not work, visit https://www.python.org, click on Downloads, and select the version for your operating system.
Step 2: Run the Installer
- Locate the downloaded file in your Downloads folder.
- Double-click to run the installer.
- Click Install Now for default settings or choose Customize Installation for advanced options.
Step 3: Verify Installation
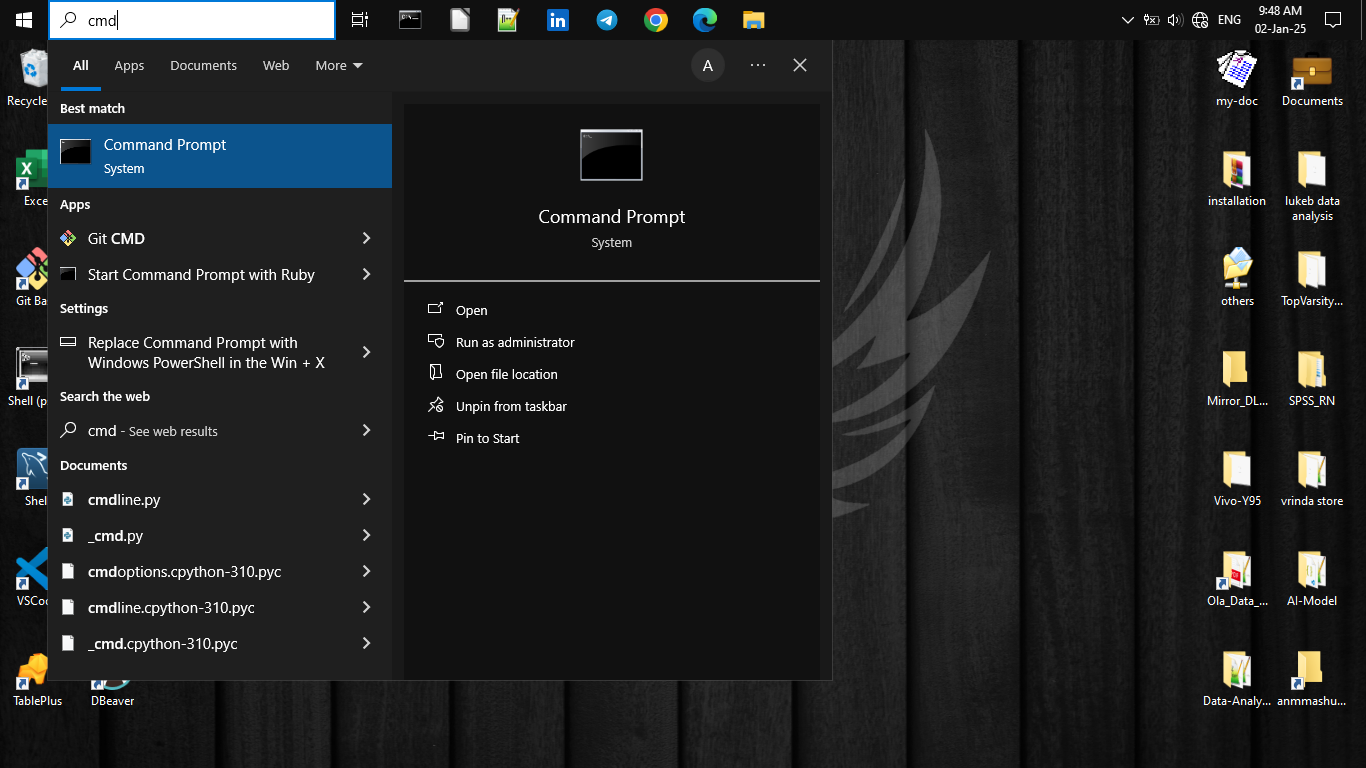
- After completion, open Command Prompt:
- Press
Win + R, typecmd, and press Enter. - Alternatively, press the Windows key on your keyboard, type
cmd, and hit Enter.
- Press
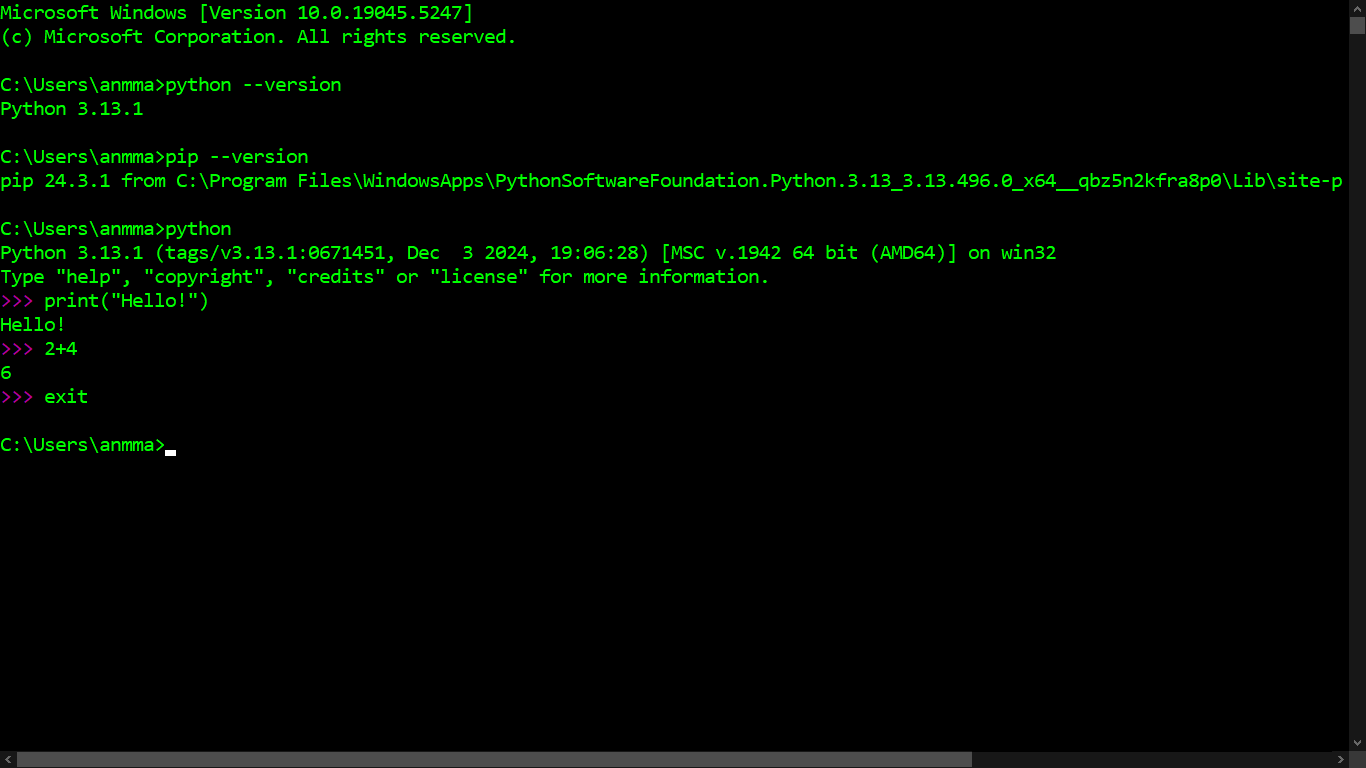
- Check the Python version:
python --version
- Check the pip version:
pip --version
Step 4: Test Python
Open Python in Command Prompt:
python
Run a test command:
print("Hello, World!")
Output:
Hello, World!
Exit Python:
exit()
Here are my screenshots. Don’t worry about the terminal color; you can customize it as well.


Conclusion
You’ve successfully installed Python on Windows. Stay tuned for the next blog!
Enjoy Reading This Article?
Here are some more articles you might like to read next: